

How to Sanitize Equipment for PMU Services
A beautiful healed result starts long before pigment touches the skin. Your sanitation routine is part of your technique, your client experience, and your professional reputation. If you are learning how to sanitize equipment for permanent makeup, the first lesson is this: sanitation is not a quick wipe-down between appointments. It is a repeatable system that protects clients, protects your business, and helps you work with the confidence of a trained professional.
For PMU artists, cosmetic tattoo technicians, estheticians, and fine-line tattoo artists, sanitation is also where career readiness becomes visible. Clients may not understand needle configurations or pigment correction, but they notice a clean setup, sealed supplies, gloves changed at the right time, and an artist who can clearly explain their protocol.
Sanitation, Disinfection, and Sterilization Are Different
These terms are often used interchangeably, but they do not mean the same thing. Knowing the difference helps you choose the correct procedure for every item in your workspace.
Cleaning removes visible debris, pigment residue, dust, and organic material. An item must be cleaned before it can be properly disinfected or sterilized. If residue remains on a surface or reusable tool, your next step may not work as intended.
Sanitizing lowers the number of germs on a surface to a safer level. In a PMU setting, sanitizing alone is not always enough for environmental surfaces exposed to blood or body fluids.
Disinfection uses an EPA-registered disinfectant to destroy many disease-causing microorganisms on nonporous surfaces. The product must be used exactly as directed, including its required contact time. Spraying and immediately wiping away the product is one of the most common sanitation mistakes in beauty services.
Sterilization destroys all microbial life, including bacterial spores. Reusable tools that penetrate the skin or may contact blood must be handled according to applicable board requirements and manufacturer instructions. In many PMU procedures, artists rely on sterile, single-use needle cartridges and disposable supplies rather than attempting to reprocess critical items.
Your state board, local health authority, and product manufacturer set the rules that apply to your service. Never assume that a product labeled "antibacterial" is appropriate for professional disinfection or sterilization.
How to Sanitize Equipment Between PMU Clients
A reliable turnover routine begins the moment a client leaves the service area. Do not wait until the end of the day, and do not rely on memory. Create a written workflow, train it until it becomes automatic, and keep the supplies you need within reach.
Start by removing and disposing of all single-use items. This can include needle cartridges, microblades, pigment cups, dental bibs, barrier film, disposable razors, cotton applicators, gauze, gloves, and any item contaminated during the procedure. Place sharps directly into an approved sharps container. Do not recap, bend, or carry used needles across the room.
Next, remove contaminated barriers carefully while wearing gloves. Barrier film is designed to keep hard-to-clean equipment from becoming contaminated in the first place. Think beyond your tray. Machine grips, cords, power supplies, light handles, bed controls, drawer pulls, pigment bottles, phone screens, and magnifying lamps can all become cross-contaminated when touched with gloved hands.
Once barriers and disposables are removed, clean visible residue from reusable, nonporous surfaces. Then apply your approved disinfectant. Follow the label for dilution, application method, and contact time. Some products need to remain visibly wet for several minutes to achieve the stated level of disinfection. That time is not optional.
After the contact time is complete, allow surfaces to air dry or wipe them only if the product instructions permit it. Remove gloves, perform proper hand hygiene, and put on fresh gloves before setting up the next client. A clean workstation is only effective when your clean setup stays separate from contaminated materials.
Build Your Setup Around Barriers and Single-Use Supplies
The easiest contamination problem to solve is the one you prevent. Smart setup reduces the number of surfaces that need to be disinfected after each service and makes your workflow faster without cutting corners.
Before the appointment, cover equipment that may be touched during the procedure. Use barriers on your machine, cord, power supply, procedure bed controls, lamp handles, and any other high-touch surface. Dispense only the amount of pigment, numbing product, ointment, and disposables needed for one client. Never return leftover product to its original container.
Keep clean supplies in a clearly designated area and contaminated items in another. This distinction matters when you are working with a live model, answering student questions, or moving through a busy service day. An organized station keeps you from reaching into a clean drawer with contaminated gloves.
Single-use sterile cartridges and prepackaged disposables support a safer, more efficient service model. They also create a clear visual signal for clients: the items touching their skin are new, protected, and opened for their appointment. For services such as nano brows, lip blush, eyeliner, scalp micropigmentation, and fine-line tattooing, this confidence is part of the premium experience.
Reusable Tools Need a Separate Process
Not every tool belongs in the same cleaning routine. Noncritical items that only touch intact skin may require cleaning and appropriate disinfection. Tools that can contact broken skin, blood, or mucous membranes demand a higher level of control.
If your service uses reusable instruments, do not treat them as a simple wipe-and-reuse item. Follow the manufacturer’s instructions for cleaning, packaging, processing, and storage. Use the sterilization method required for the instrument and your jurisdiction. Maintain records where required, including sterilizer monitoring and maintenance documentation.
Do not use damaged equipment, cracked grips, corroded tools, or items that cannot be thoroughly cleaned. A tool that cannot be properly processed does not belong in a professional treatment room. Replacing questionable equipment costs less than risking a client’s safety or your license.
Protect Products From Cross-Contamination
Your sanitation protocol extends to pigment, topical products, and retail inventory. A pigment bottle can look clean while its exterior has been touched repeatedly during a procedure. The same is true for anesthetic containers, soap bottles, spray bottles, and ointment jars.
Use clean gloves to dispense products before the procedure when possible. Avoid touching the original bottle after beginning the service. If you need additional product, change gloves first or use a no-touch dispensing method. Label secondary containers correctly and never top off old product with new product.
Check expiration dates and store products according to their labels. Keep pigments and topical products away from direct sunlight, excessive heat, and contaminated work areas. Inventory control may not sound glamorous, but it is a business discipline that separates a serious studio from a hobby setup.
Common PMU Sanitation Mistakes That Cost Trust
The biggest sanitation failures are usually routine shortcuts. Artists get busy, a client arrives early, or a station is reset too quickly. That is exactly when a clear protocol matters most.
Watch for these issues in your own workflow:
- Wearing the same gloves while touching the client, phone, door handle, or clean supply cabinet.
- Reaching for pigment bottles or numbing products with contaminated gloves.
- Failing to leave disinfectant wet for its full label contact time.
- Reusing disposable items, including pigment cups, applicators, razors, or barriers.
- Treating visible cleanliness as proof that a surface has been disinfected.
- Setting up the next client before the previous client’s contaminated items are fully removed.
Make Sanitation Part of Your Professional Standard
Clients invest in permanent makeup because they want results that last. They also expect a professional environment that respects their health, time, and trust. When you explain your procedure confidently and maintain a visibly disciplined setup, you show clients that you are prepared to perform at a higher level.
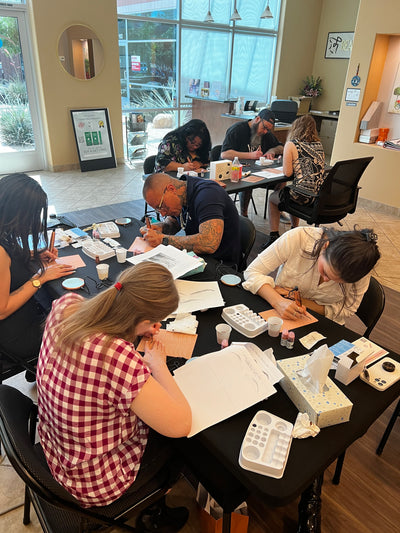
At Arizona Permanent Makeup Training Academy, hands-on education is designed to connect technical artistry with the real operational standards required to serve clients professionally. The goal is not simply to learn a service. It is to develop the habits that support licensure, client retention, referrals, and long-term business ownership.
Your sanitation routine should feel as intentional as your brow mapping, color selection, or needle choice. Build it into every appointment now, and it will become one of the quiet reasons clients feel confident choosing you again.

Leave a comment